MultiSite WordPress is a tool that allows you to install several WordPress pages on one physical WordPress installation.
I assume that you have already added a domain and installed the WP application. The next step is to add a subdomain in cPanel. Log in to the client panel and then click cPanel.

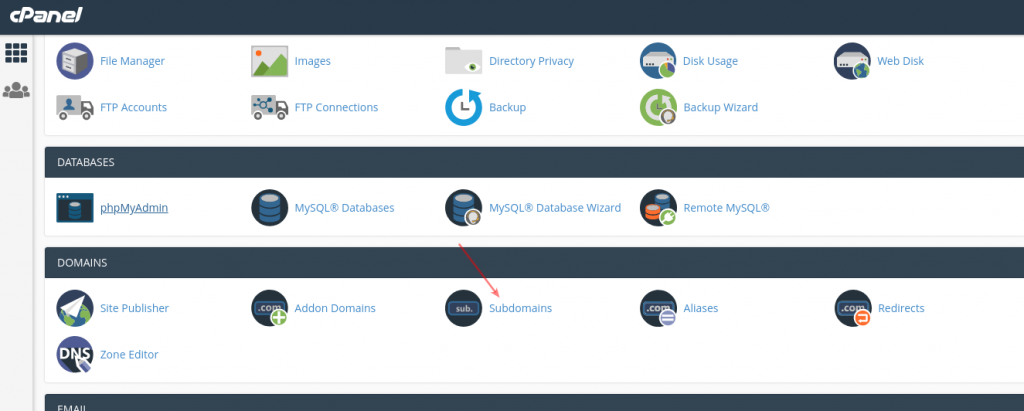
Then go to the Subdomains tab:
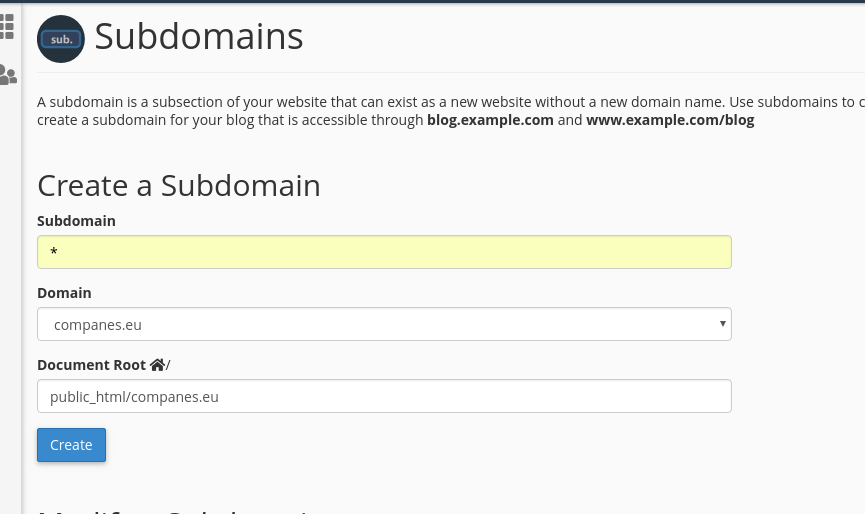
Then in the Subdomains field enter *, from the Domain field it will select the domain on which you have WP installed. In the root directory, you have to remove the name "_wildcard_" and in its place enter the directory of the domain on which you installed WP. Then click Create.
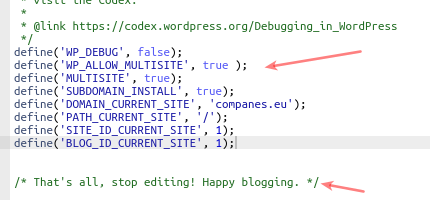
Now you have to modify the contents of the file wp-config.php. You can do this via FTP or the built-in file manager. The tool is not important.
Find the line:
define('WP_DEBUG', false);
to place a define below it:
('WP_ALLOW_MULTISITE', true );
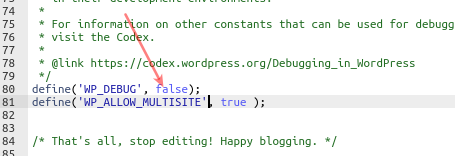
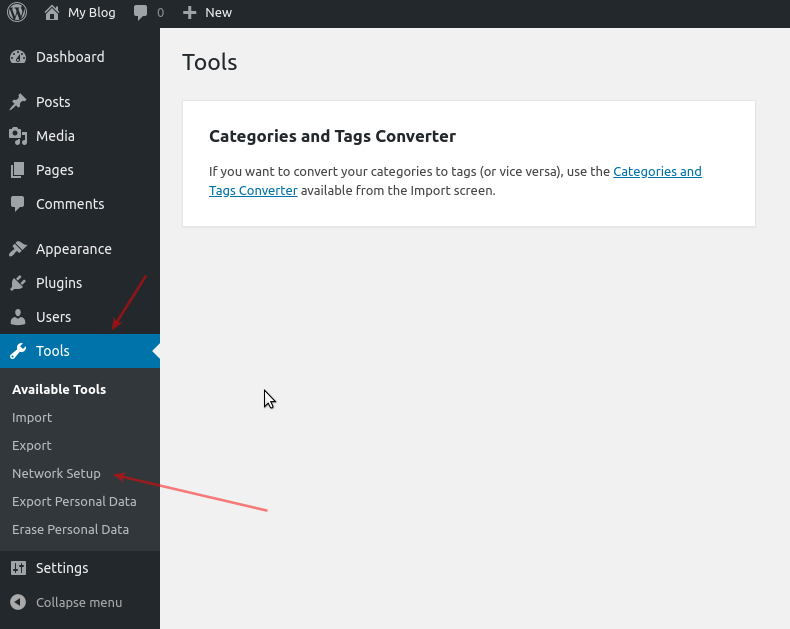
Now save the changes and send them to the server. Next, log in to WP and select Tools → Network Setup.
Then decide do you want to add WP pages on subdomains or subdirectories. I personally recommend subdomains because they are not limited in GetLark. Also, name the site network and enter the email address of the administrator.
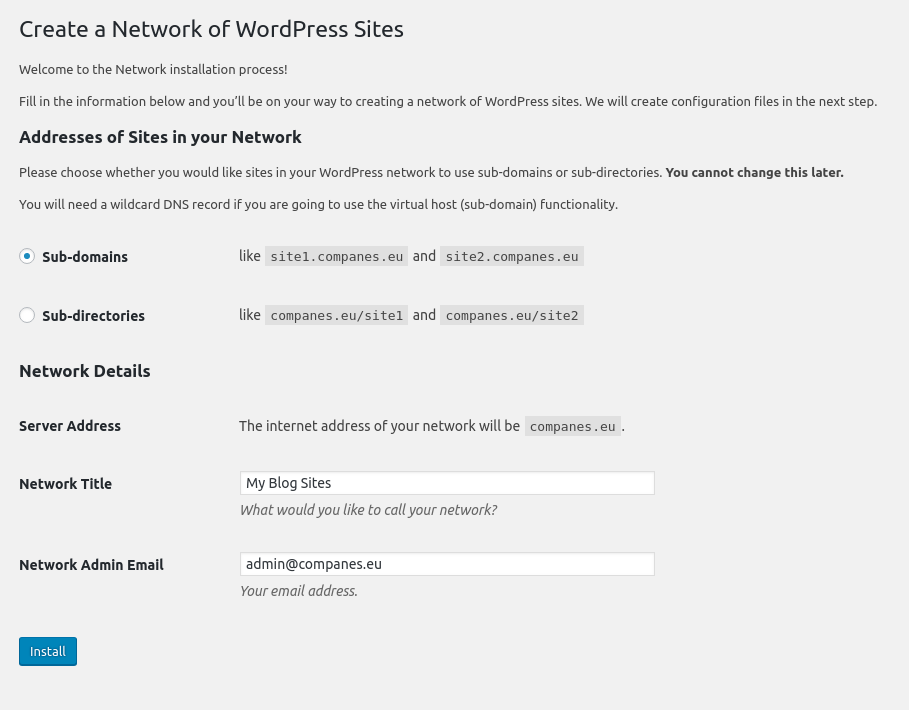
Finally, click Install. Then the system will ask you to modify the files wp-config.php and .htaccess.
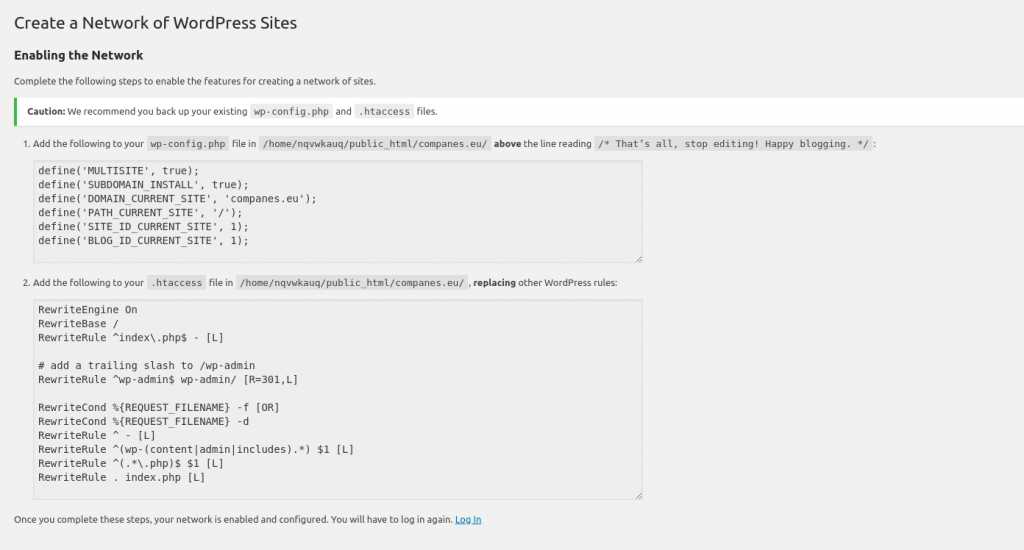
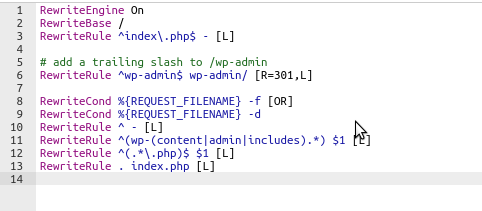
Enter the displayed data according to the instructions, save and send it to the server. Then you need to log out the application to make changes.
wp-config.php file:
.htaccess file:
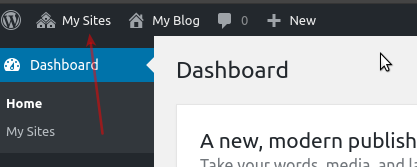
After logging in again, you will find a new My Sites feature at the top of the site.
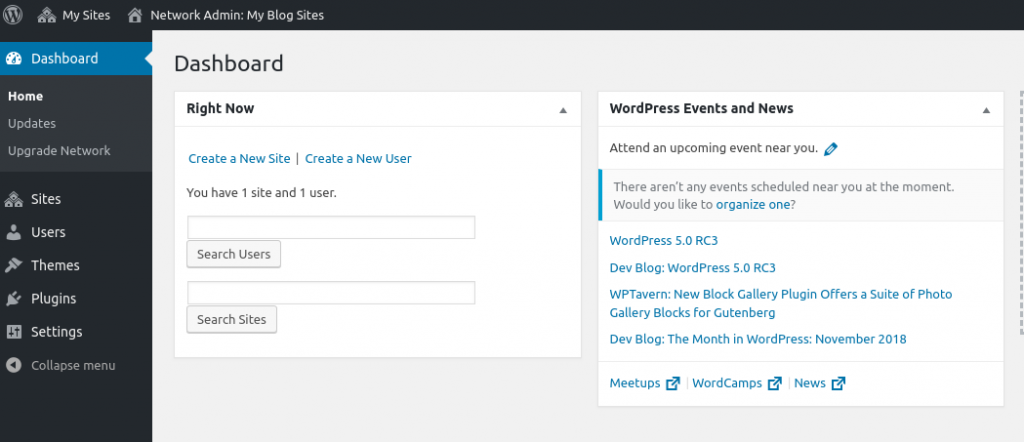
By choosing Network admin you will be able to add a new page as well as a new user.
Still have questions? Contact us.

